Coloring water bodies generated by Lakes node is very easy and straightforward. The essential process is to take the depth output and colorize it using CLUTer. With a few subtle enhancements, you can take it to the next level.
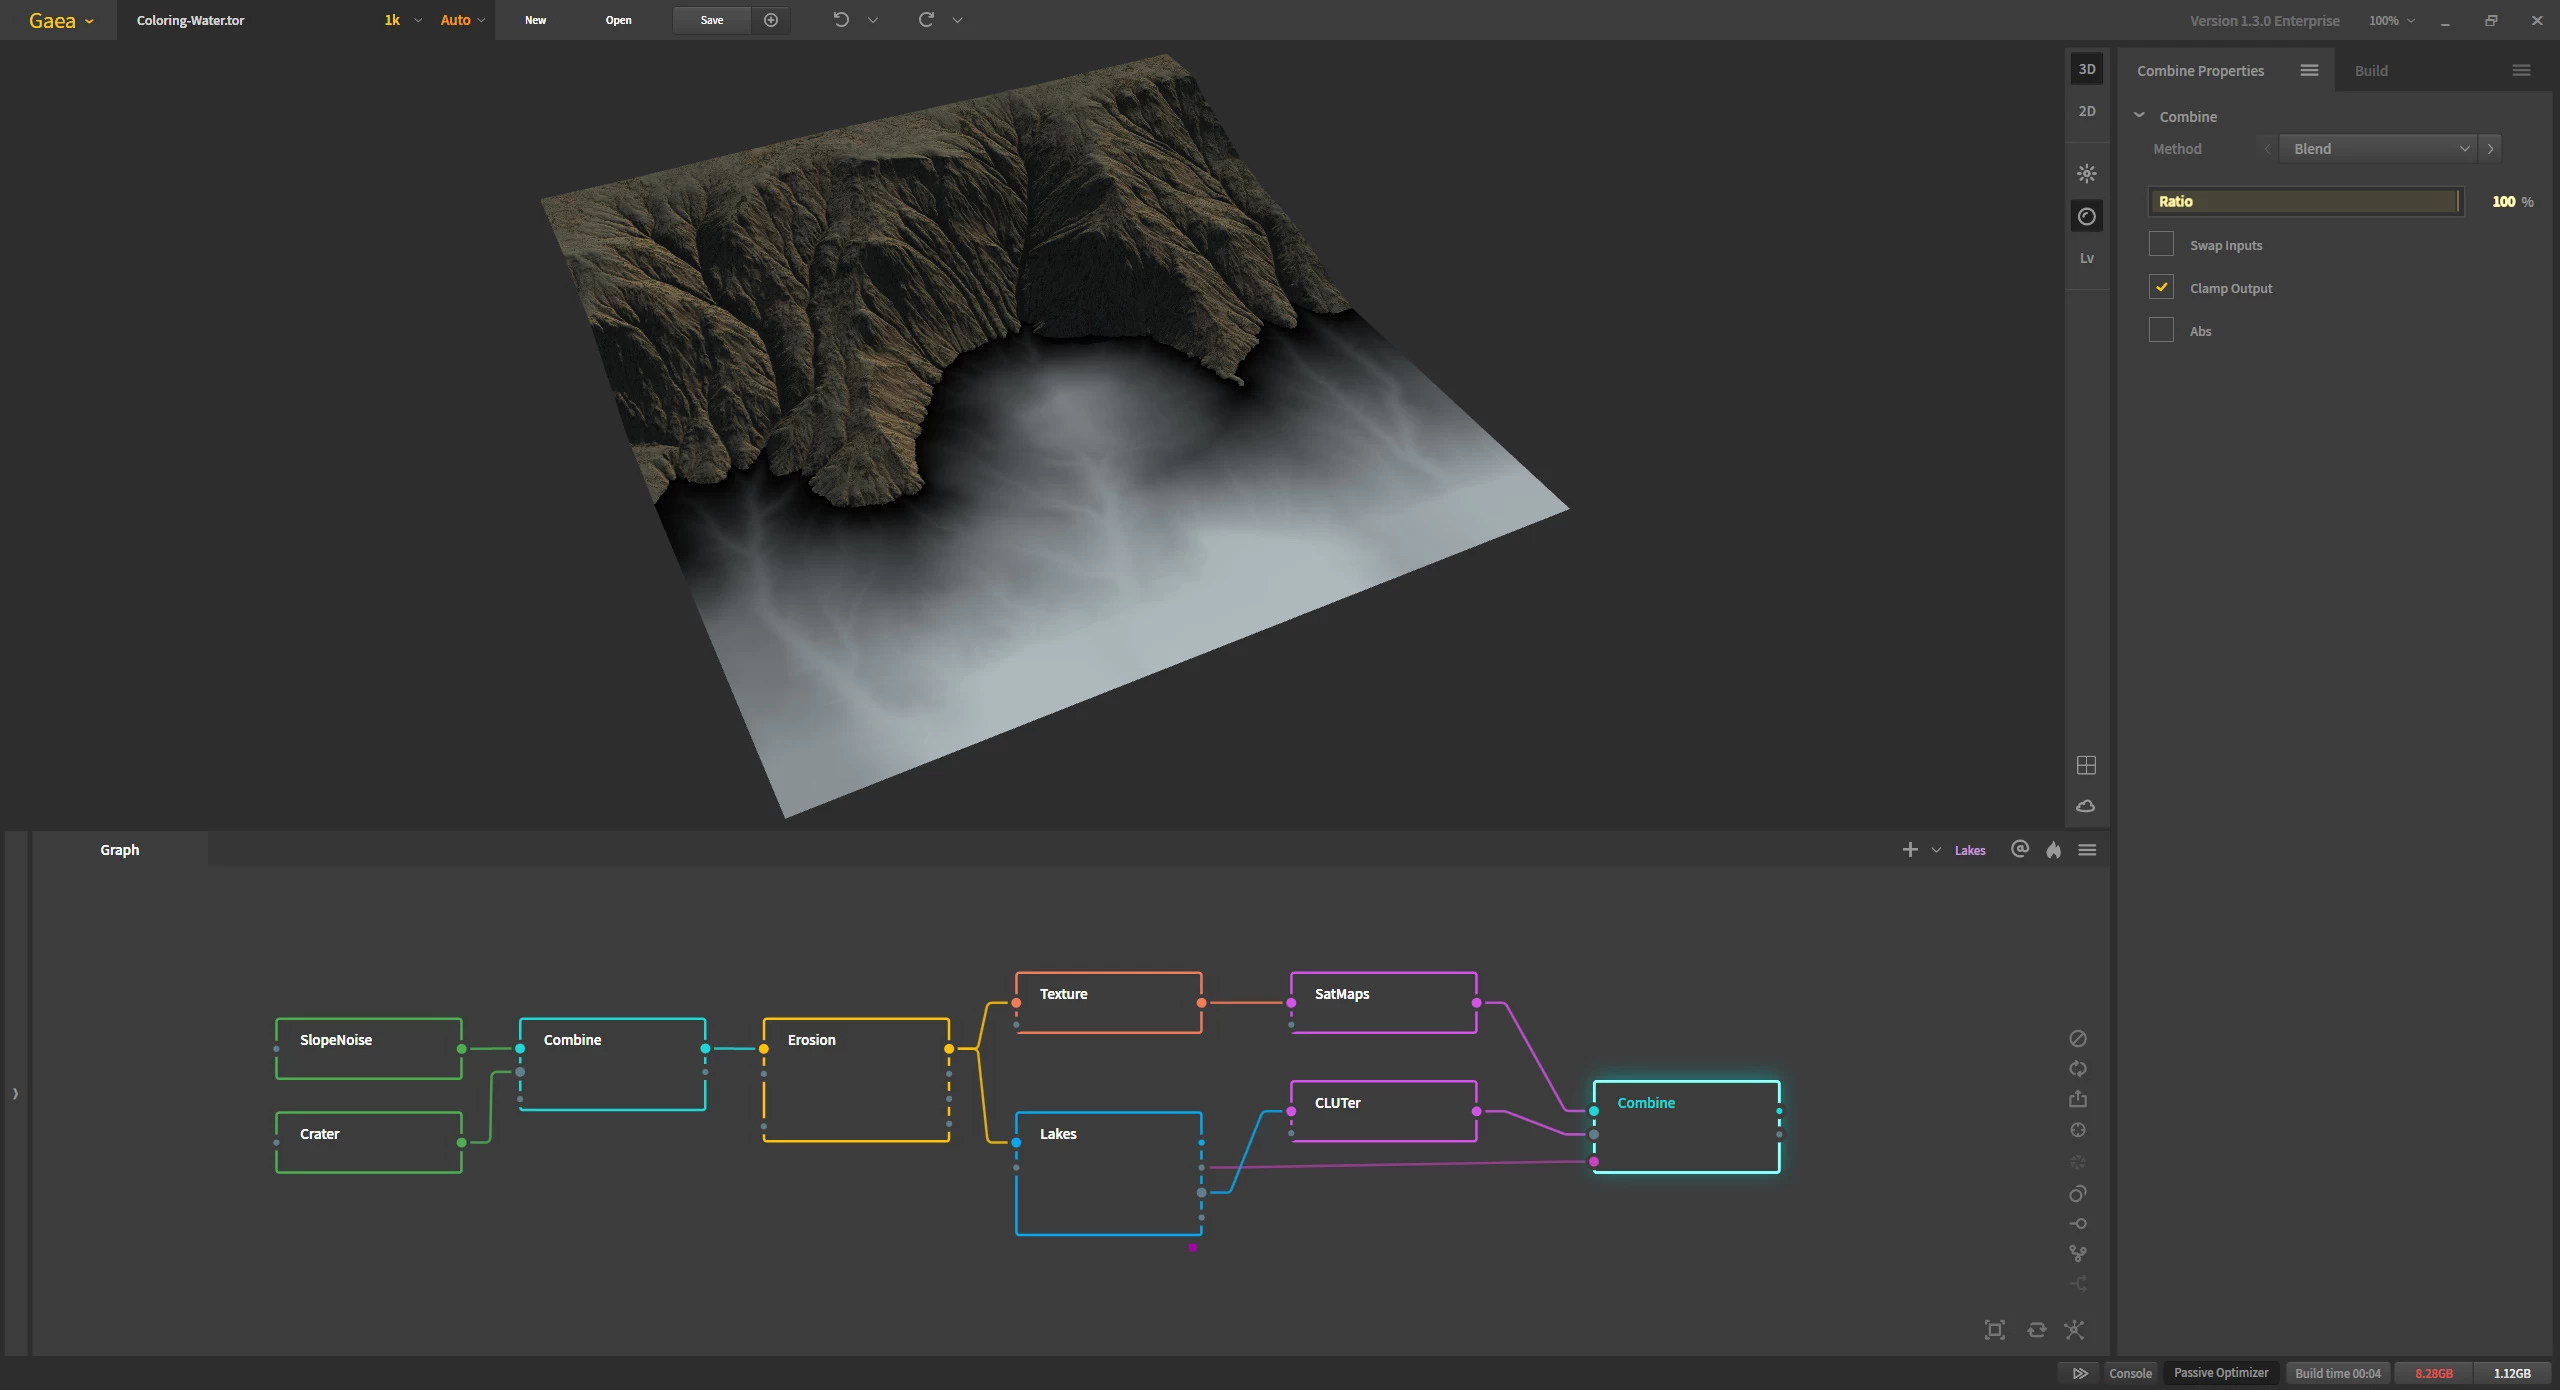
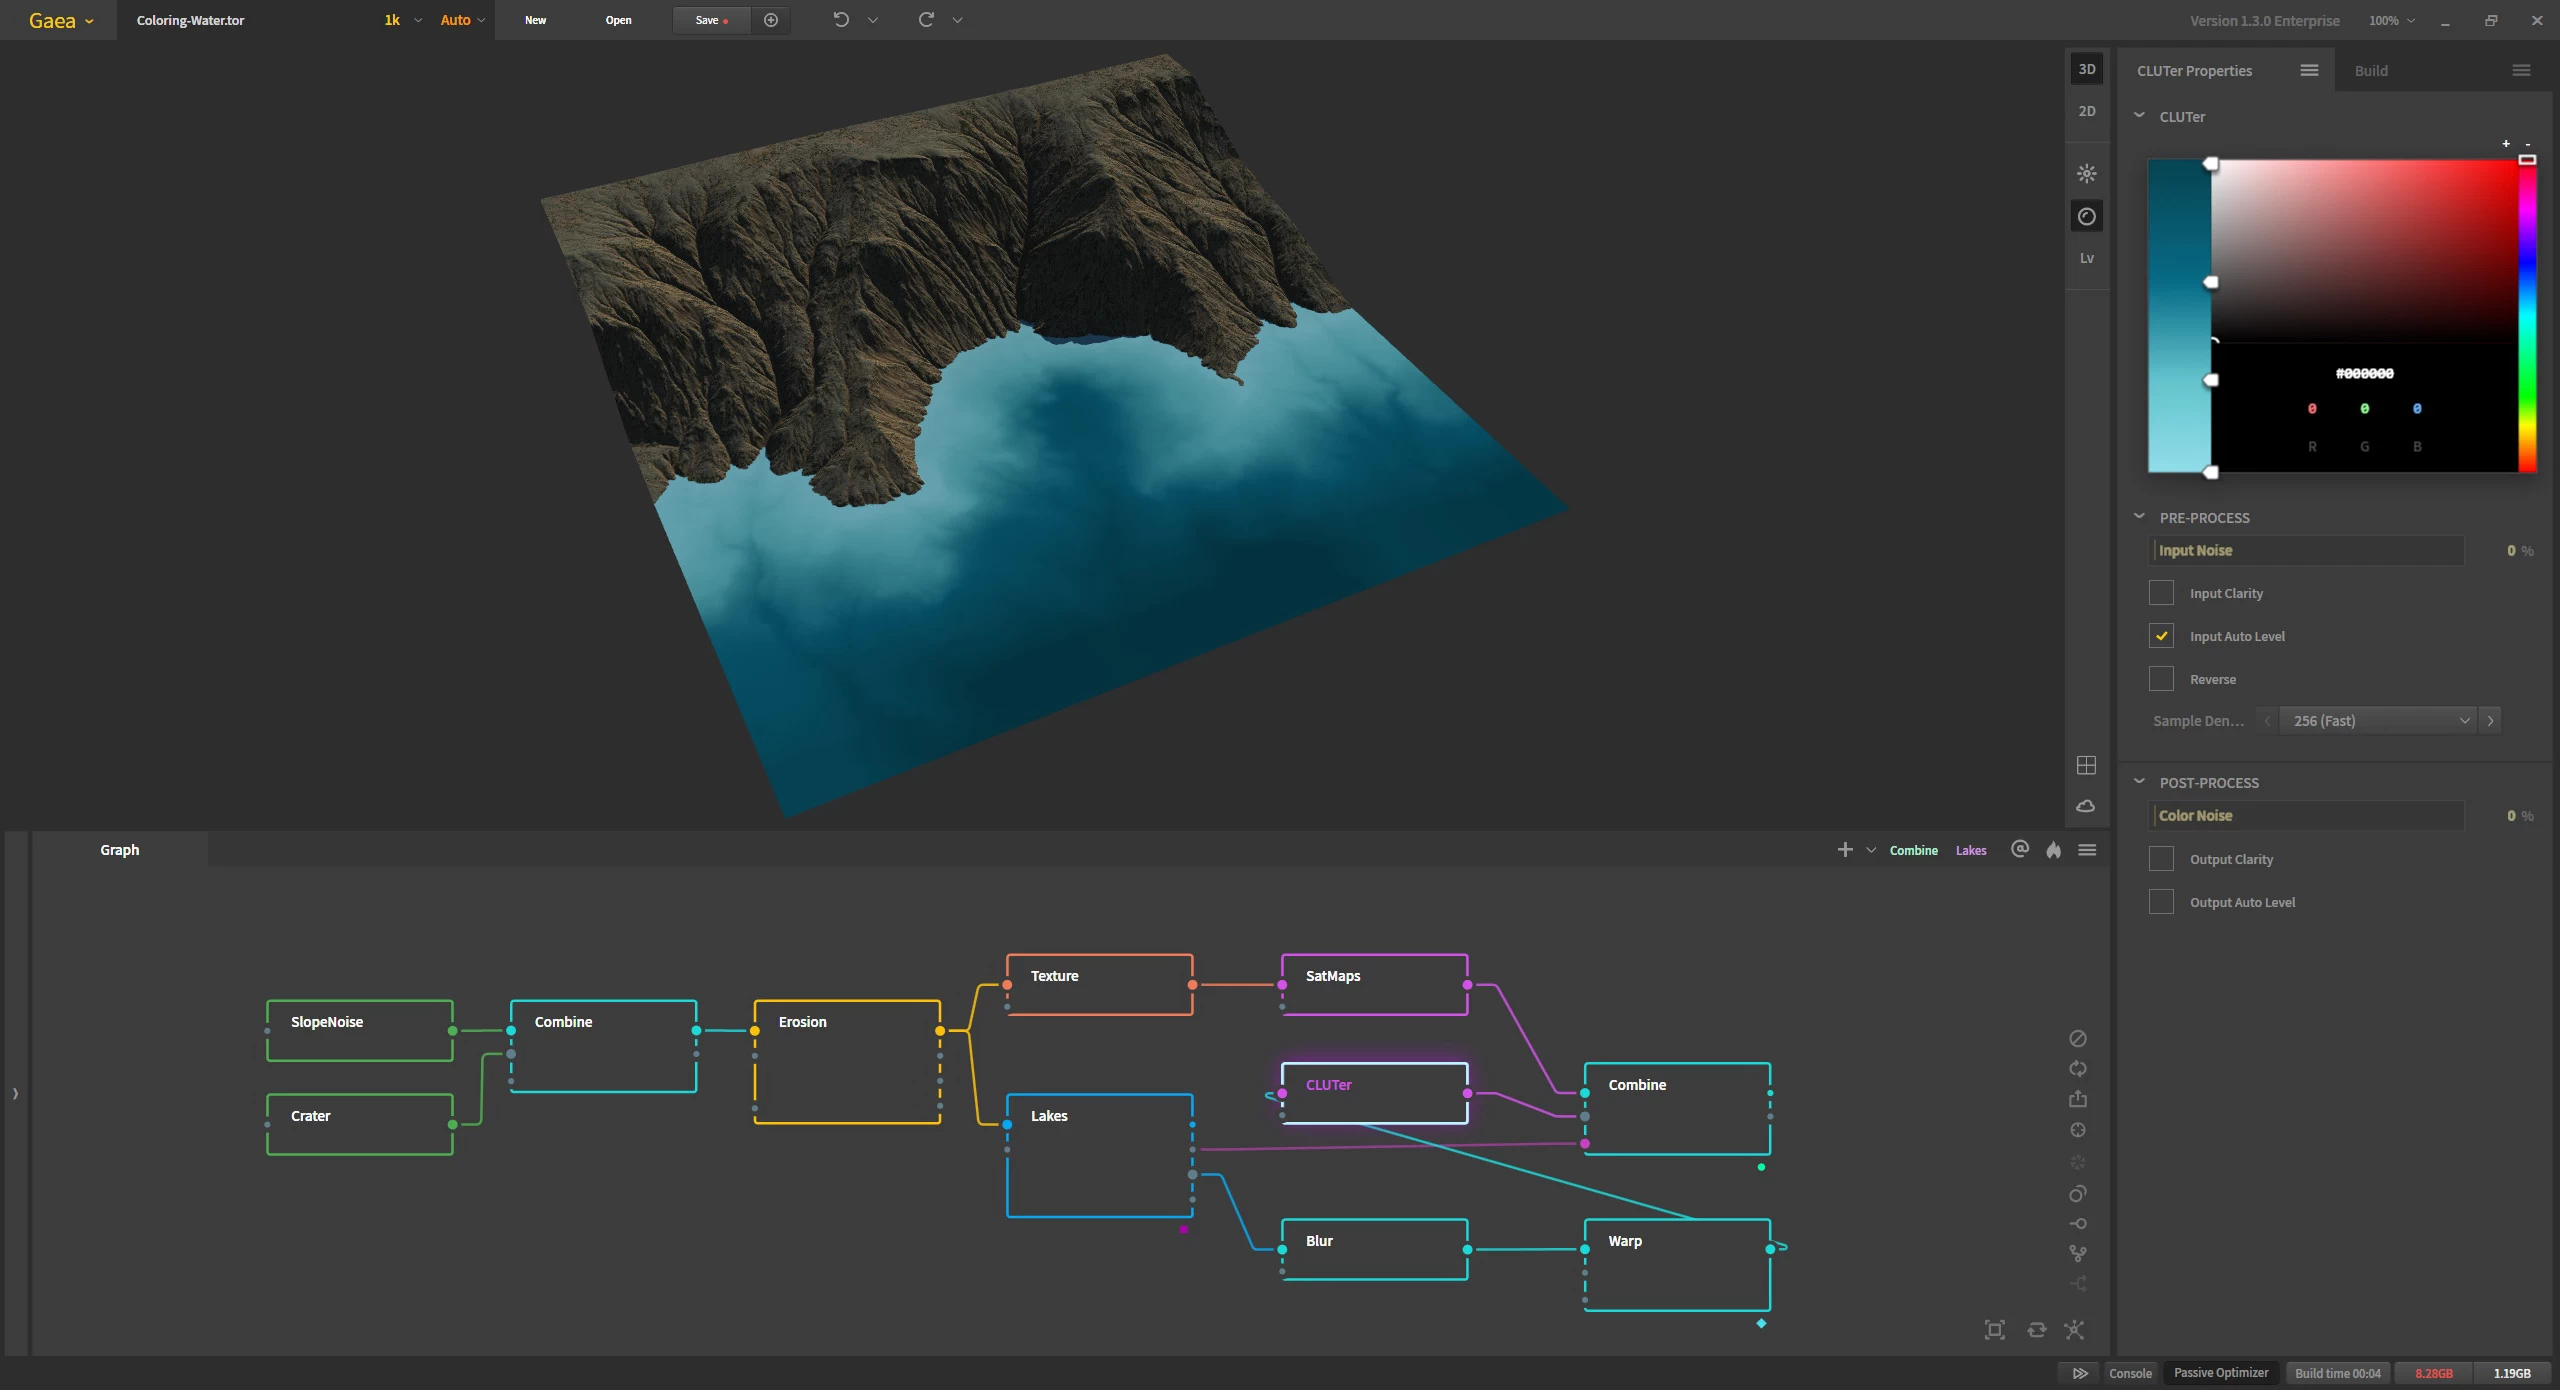
Let's first look at our setup. We use the Lakes node to create the water surface. However, for creating the ground texture, we attached the Texture node directly to the Erosion node instead. The best way to texture terrains with water is to create the color maps for the terrain and water surface separately and merge them afterwards.
The Depth output from the Lakes node goes to a CLUTer node, which is then attached to Combine with the SatMaps for the terrain using 100% Blend mode. The Lakes Mask output is used to mask the blending process.
Next we edit the CLUTer node to change the black and white gradient to something more appropriate for water. The bottom of the gradient maps to the darker (closer to the surface) parts of the Depth mask, while the top maps to the lighter (deeper) parts. It is a good idea to keep the color variations closer to the shore and have only subtle color changes in the deeper areas.
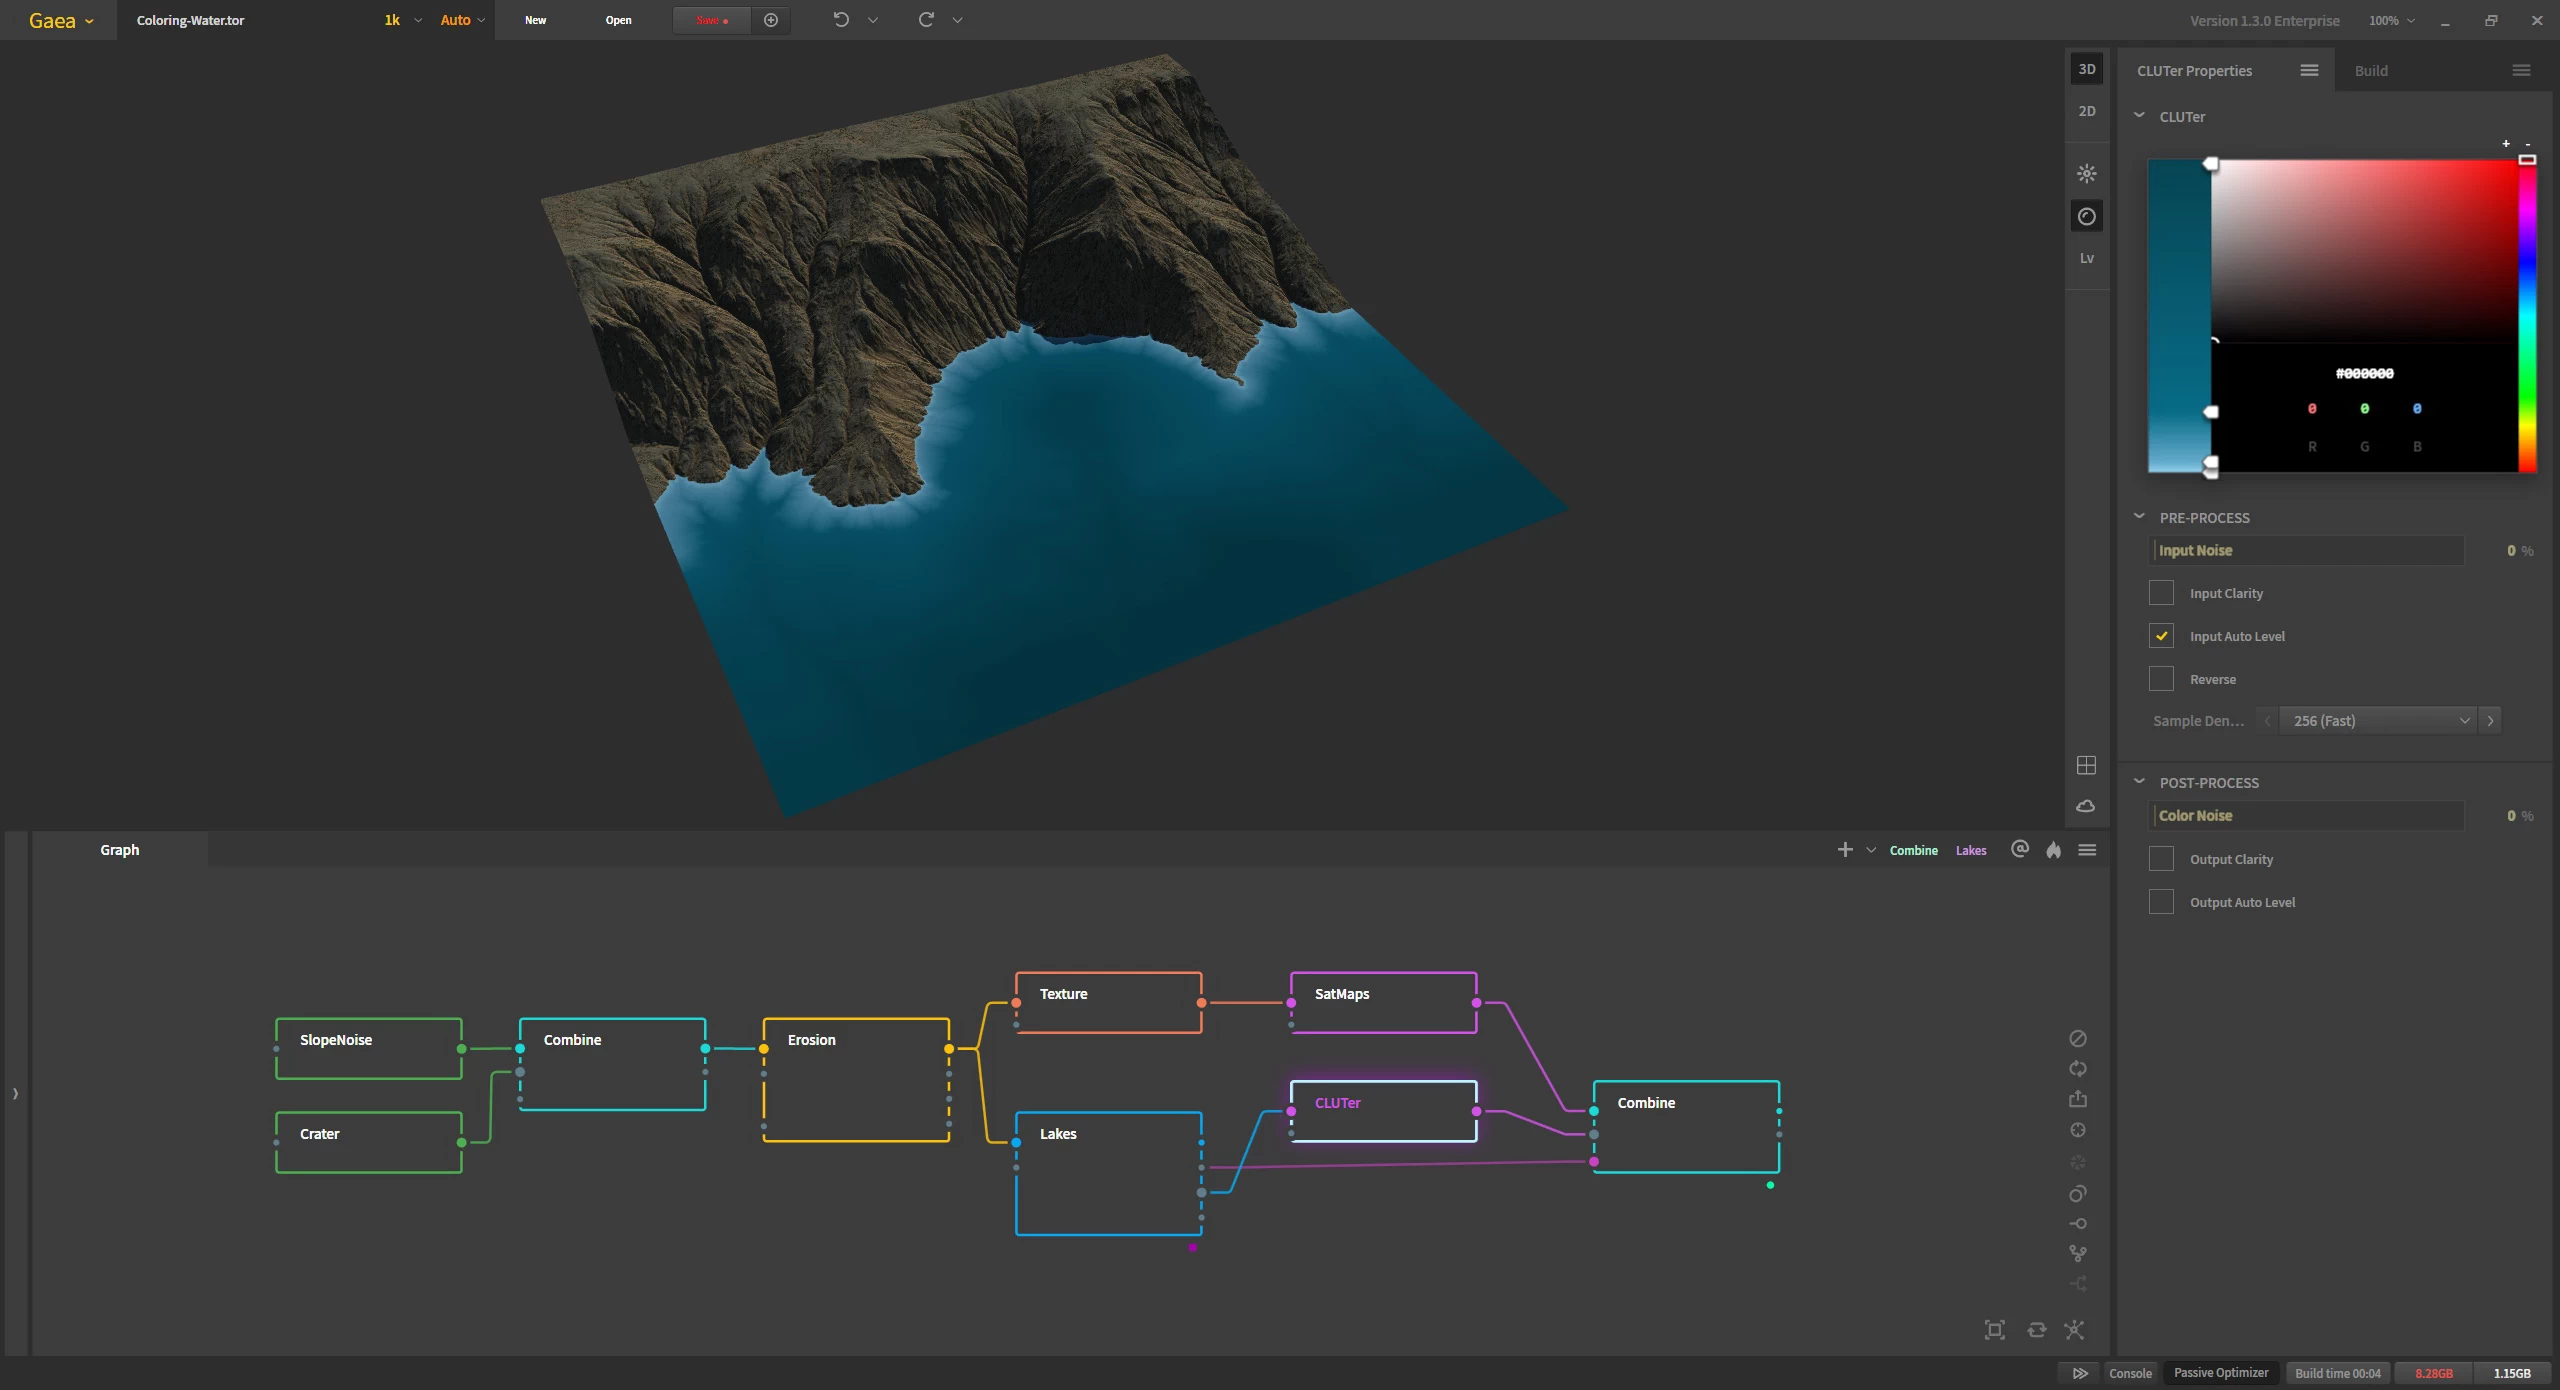
And that takes care of the main process.
If you want to take it further, we can modify the graph a bit by interjecting a Blur node and then a Warp node between the Depth output and the CLUTer. The Blur is set to a very low 0.10 value. Since water refracts light, having sharp features of the depth map visible in the colorization may not look too realistic. The subtle blur helps mimic refraction.
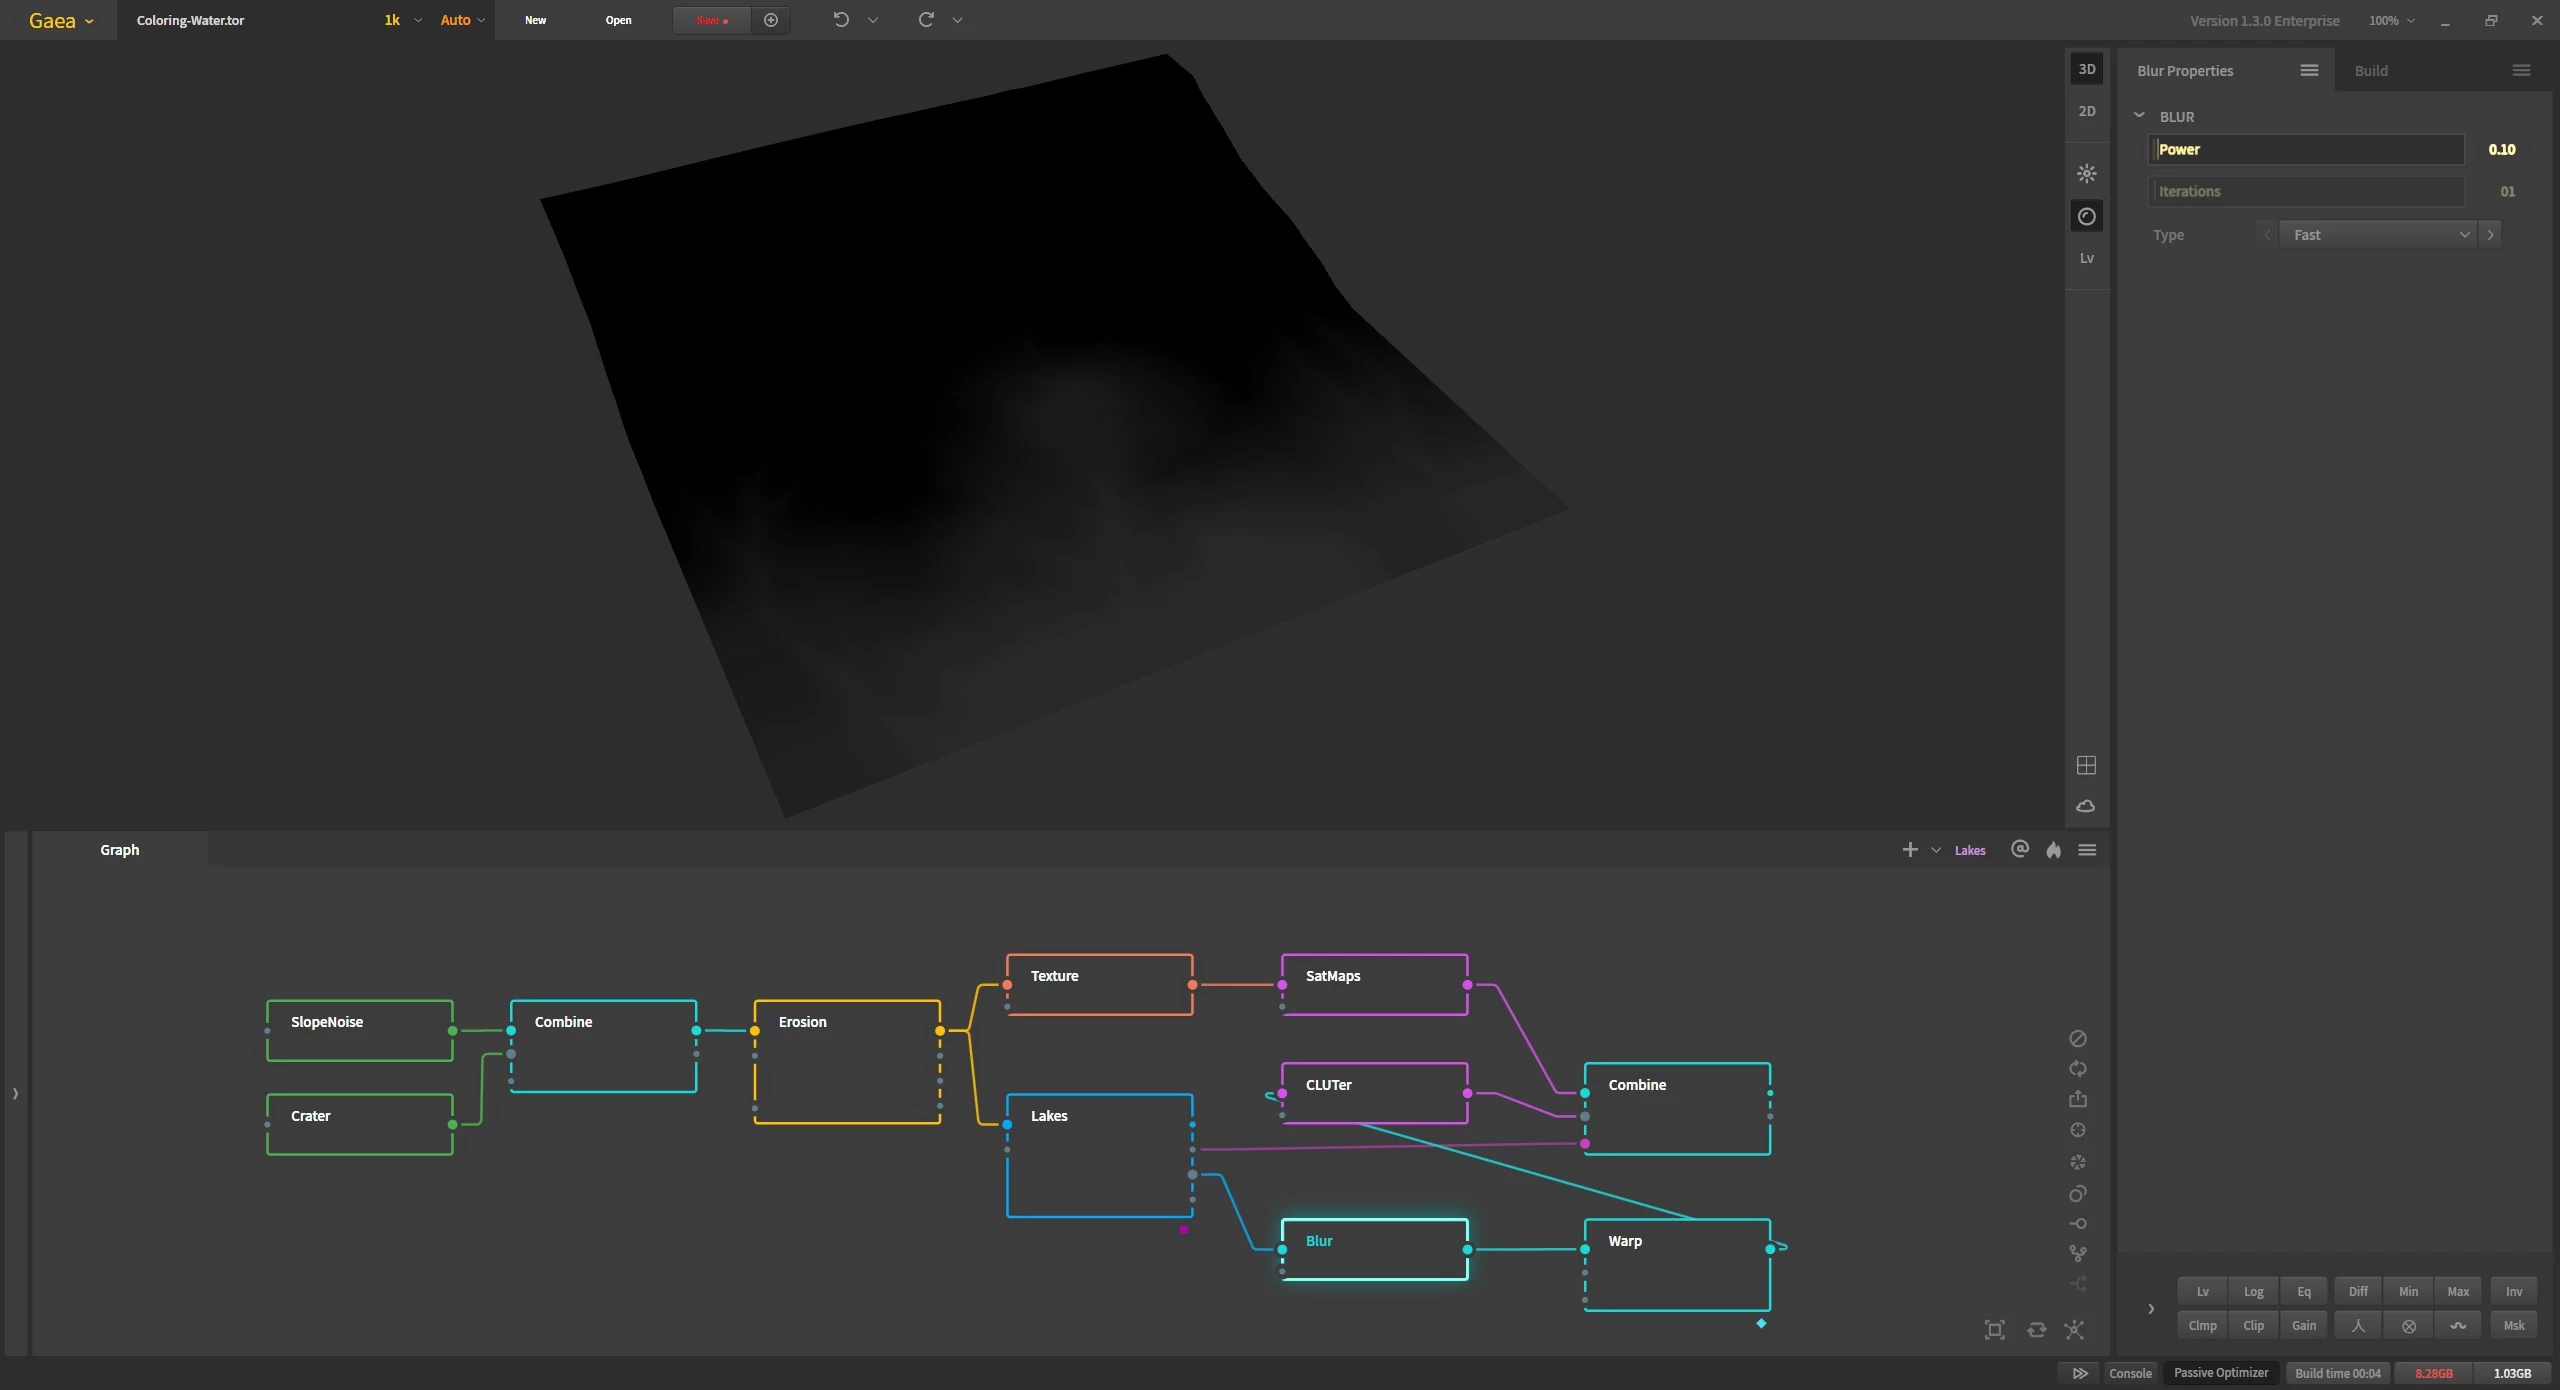
The second component of refraction in a water body is the subtle turbulence in the refracted light because of moving volumes. We simulate this with a Warp node set to a low Size and high Strength. You can play with the Roughness and Warp Source options for different variations. For most purposes, the settings shown here should suffice.
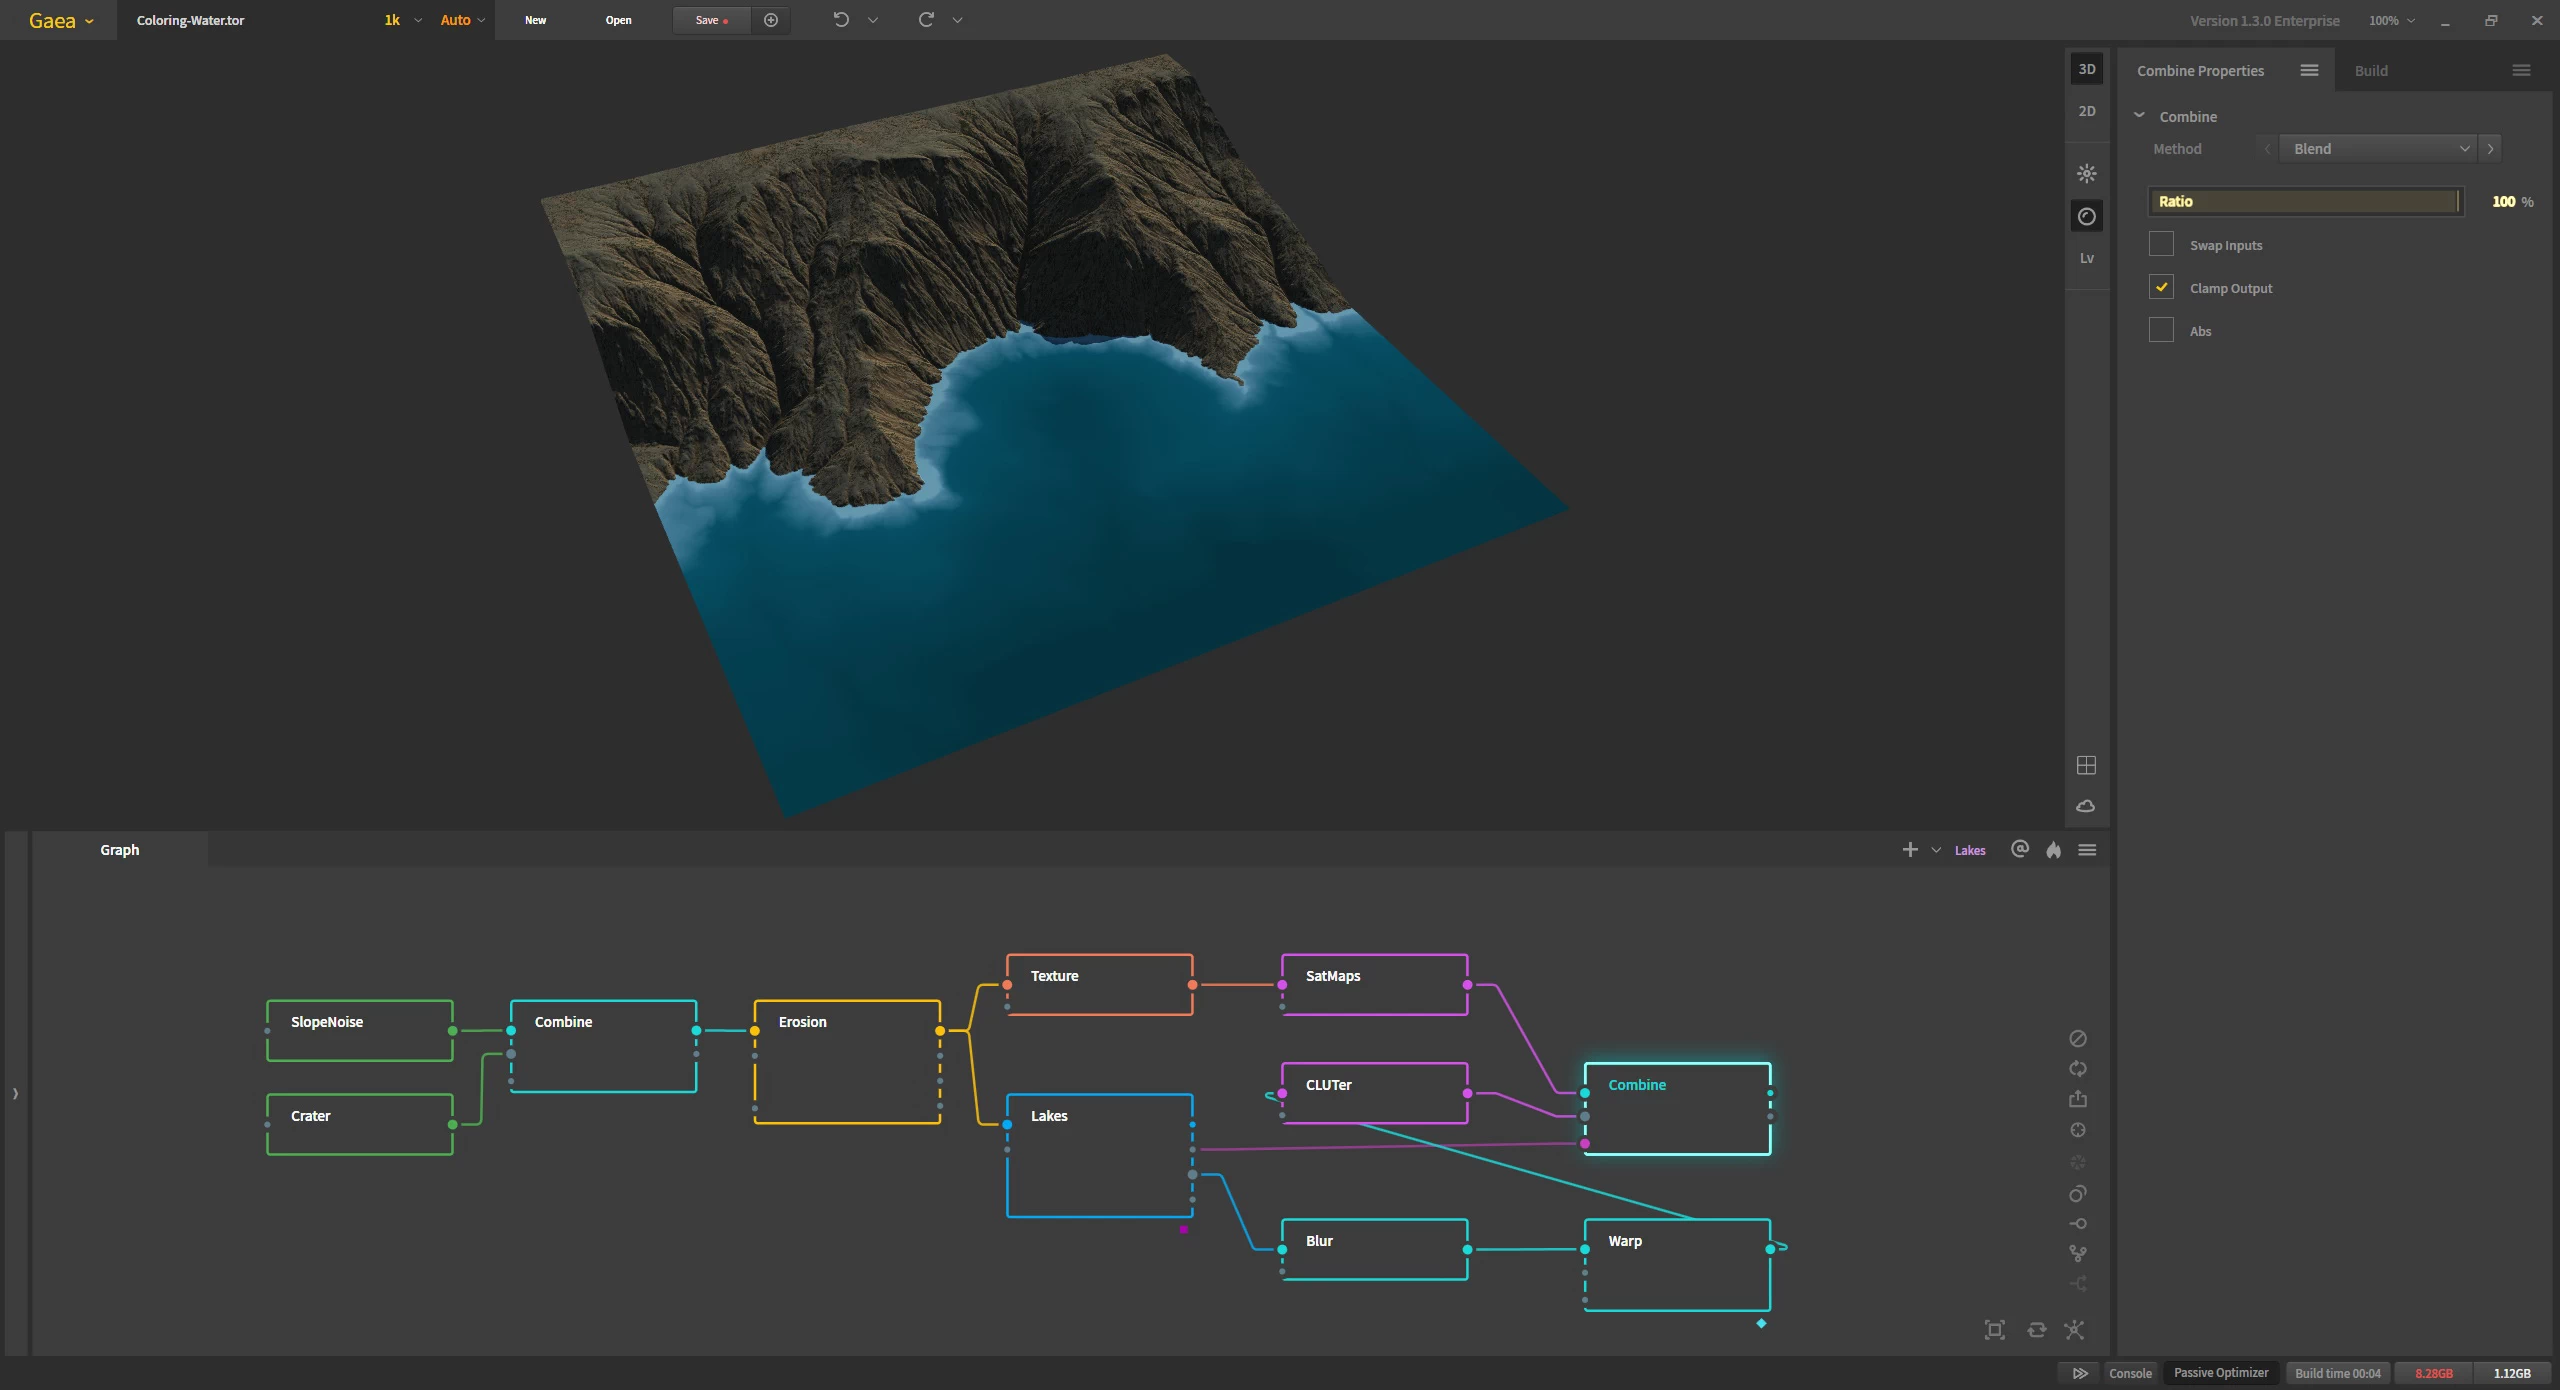
Additionally, if your warp is too powerful, you can turn on Min mode in the Post Process Stack so the warped bits don't spill over too much.

And this is how our water looks after that!
If we stretch out the colors by moving the gradient stops higher, you can see a more pronounced effect created by the Blur and Warp.

Official Website | Discord | YouTube | Instagram | LinkedIn
This documentation is licensed under the MIT License, a very permissive open-source license.