The viewport is your primary method of examining and exploring terrains. It provides a heavy duty 3D view of your terrain at different resolutions.
Gaea's viewport harnesses the powerful Unity engine, and has been deeply customized to fit advanced terrain systems. The viewport can process an 8.3 million polygon terrain in milliseconds, allowing you to work at high resolution.
3D Viewport
AltandMouse Leftto drag. Can be customized in Preferences.W,A,S,Dfor directional movement.QandEfor up and down.Mouse Wheelfor zooming.Mouse Middlefor panning.Spaceto re-center on the terrain.
When using a stylus, you may need to adjust the sensitivity for panning, zooming, and other movements. You can change the sensitivity in Preferences.
The toolbar on the side has the following commands:
- 3D Viewport
- First Person mode (temporarily unavailable)
- Toggle 2D Viewport
- Lighting and Viewport Settings
- 3D Shading
- Autolevel / Simple Mode
- Equalized Mode (only visible with 2D maps)
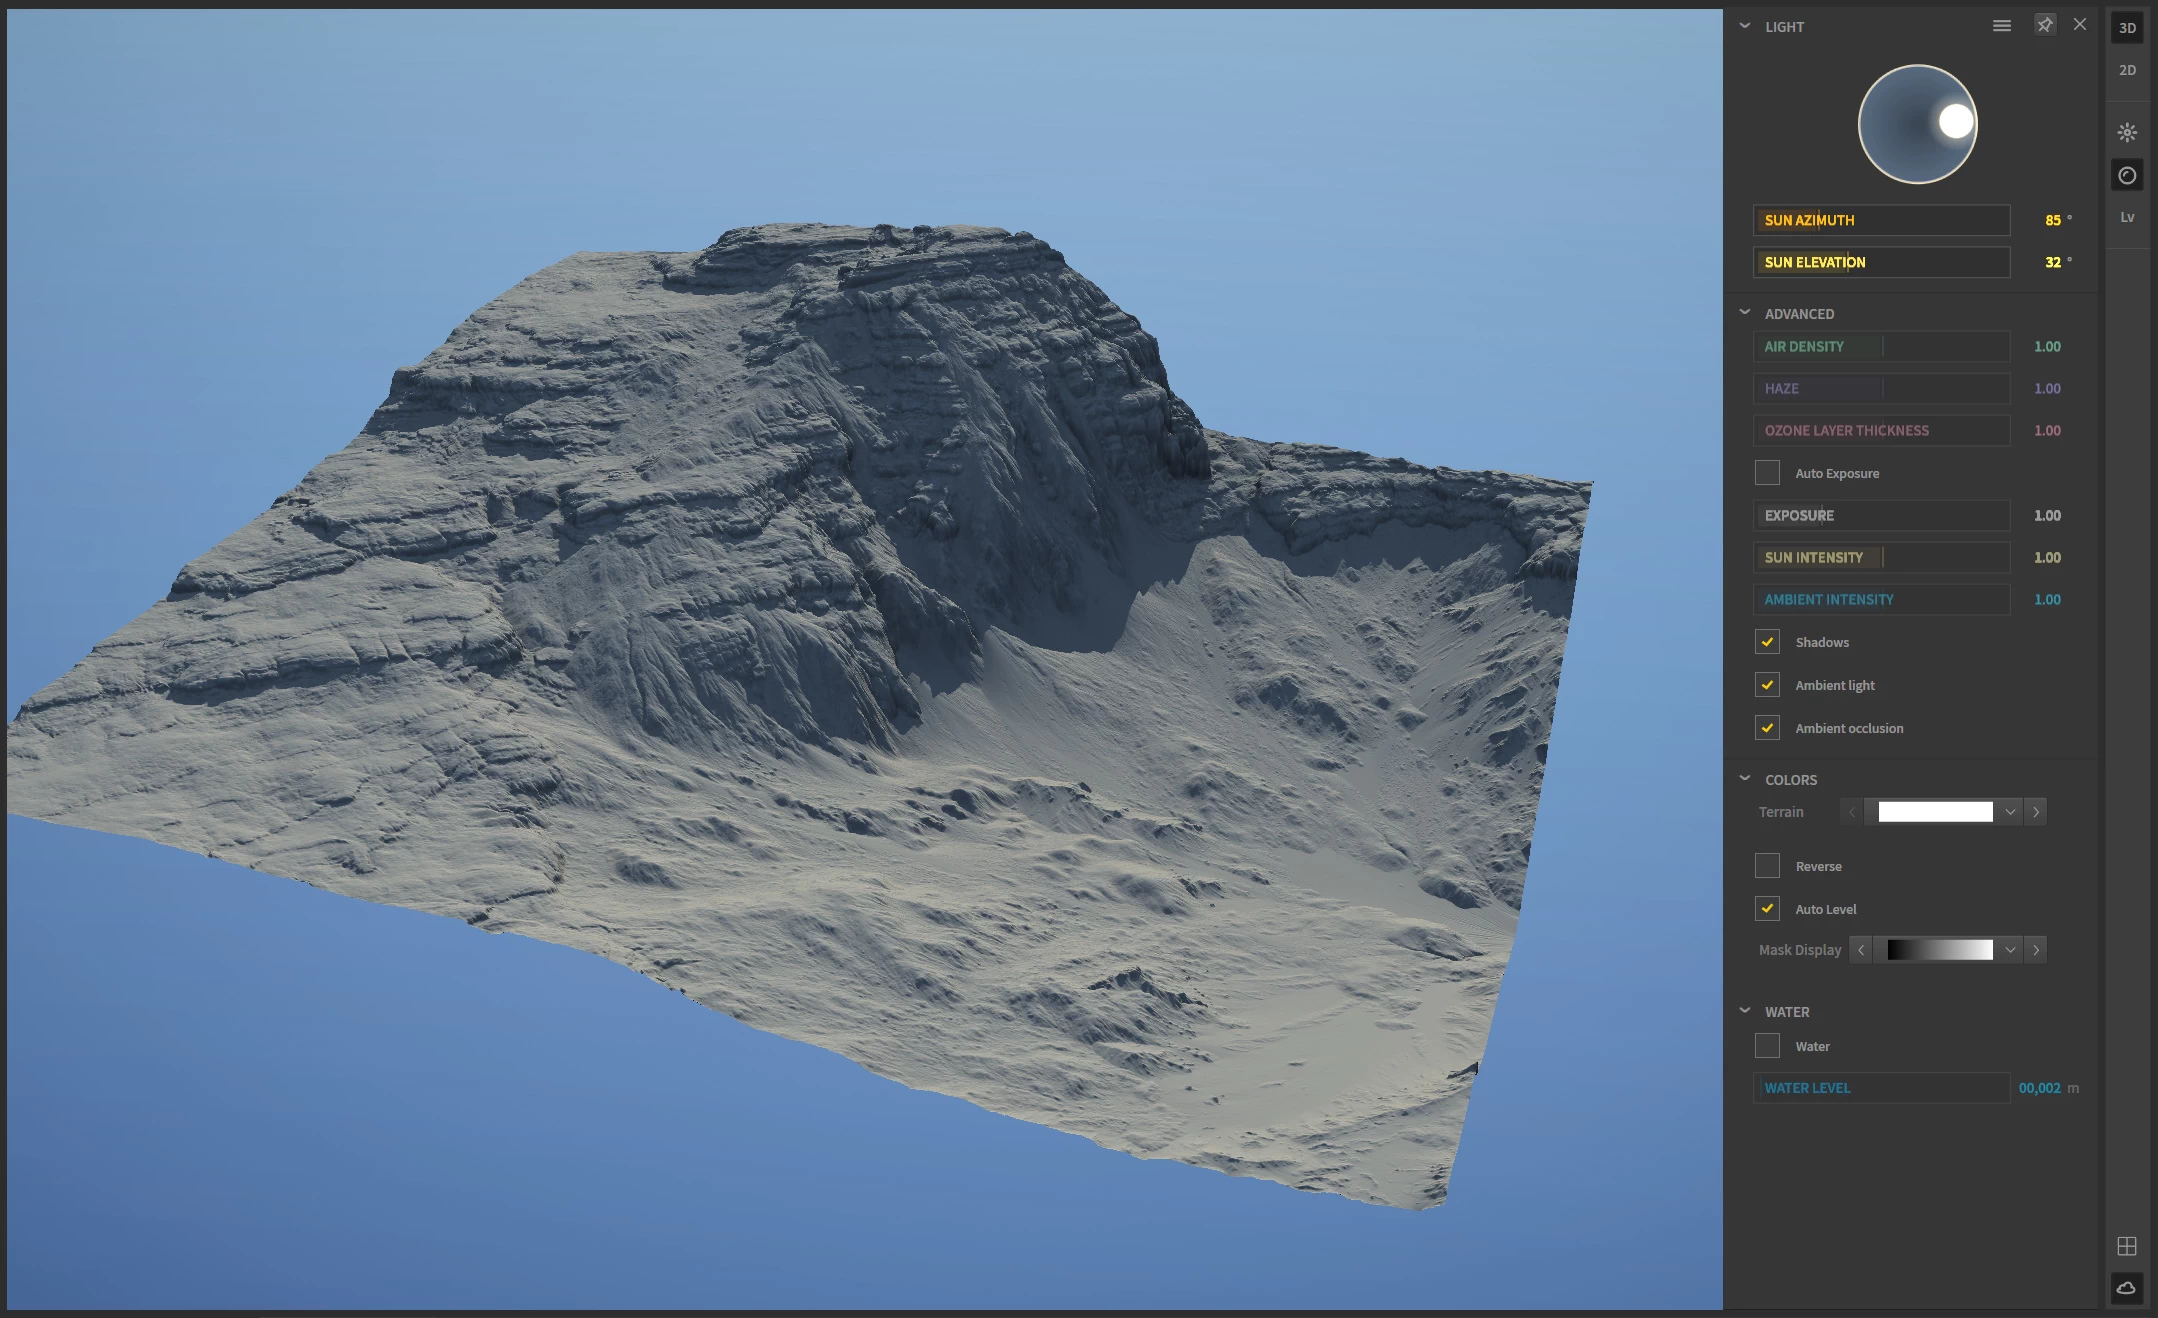
Viewport Settings
The viewport settings let you modify the look of your viewport. For details of the lighting options, see Light.
The Colors section lets you modify the color gradients used for rendering the heightfields/terrain and data/mask outputs. You can optionally autolevel or reverse the terrain gradient.
The Water section lets you use the optional water surface. This is a superficial element that does not affect the actual terrain or any nodes.
First Person View
The First Person view has been temporarily removed from Gaea. It will be added again soon.
2D Viewport
The 2D viewport provides flat previews with pixel-to-pixel accuracy. In many situations, especially when dealing with masks, you can see visual data that may not be readily visible in the 3D viewport.
The 2D view is available directly in the main window, alongside the 3D view, when activated from the main toolbar in the top left. It can also be opened as a separate window through the Graph Toolbar in the bottom right.
Mouse Wheelfor zooming.Mouse Middlefor panning.
2D Mode
The 2D mode lets you see an orthographic view of the terrain. Additionally, you can right-click the viewport to select secondary outputs if a node provides them. For example, you can see the Erosion node's wear or flow output without having to plug it into another node.
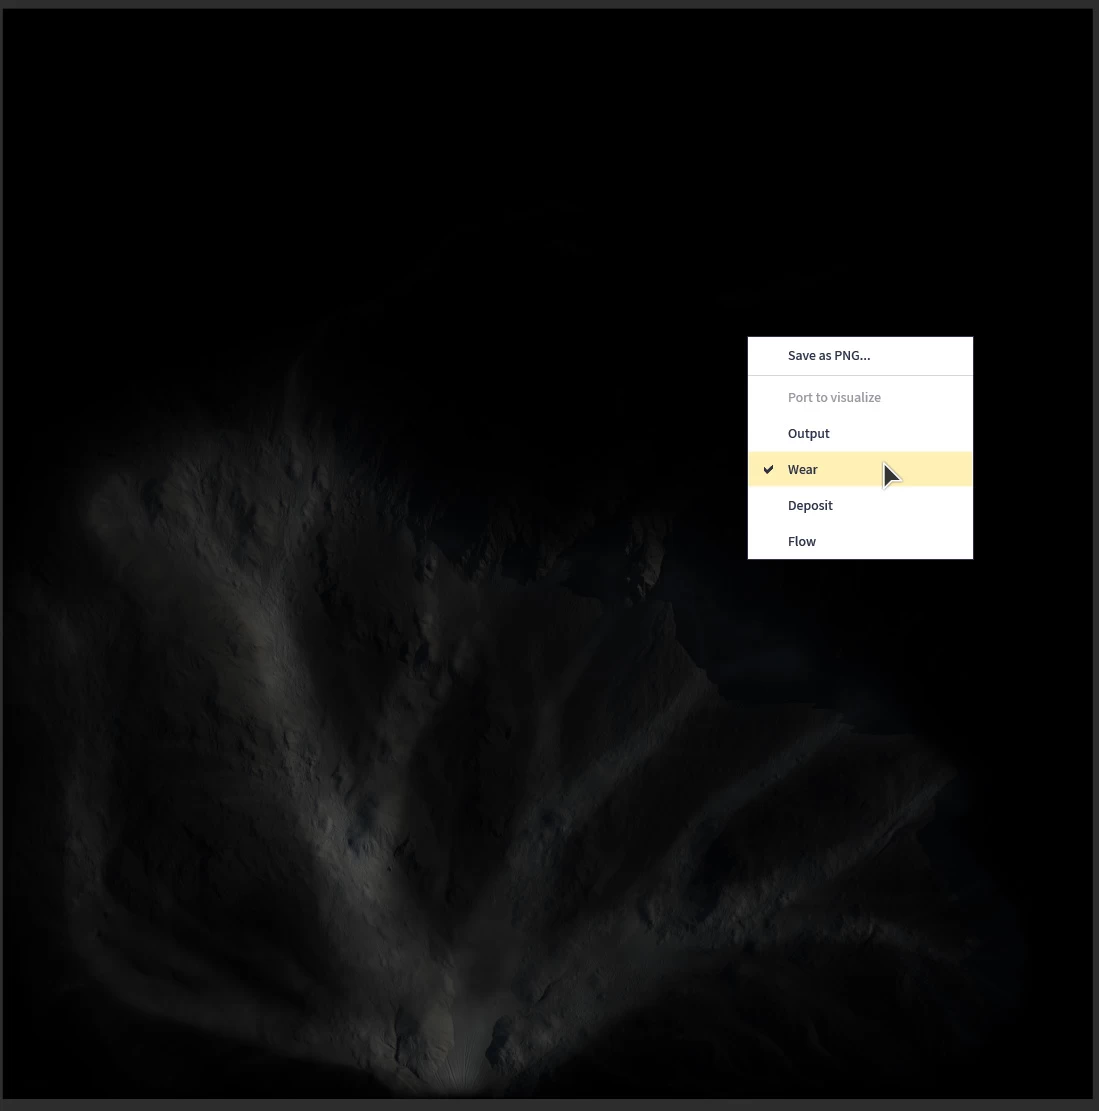
By default, the secondary output will be overlaid on the terrain. You can turn off the 3D Shading in the toolbar to see the mask by itself.
Plain / Autolevel View
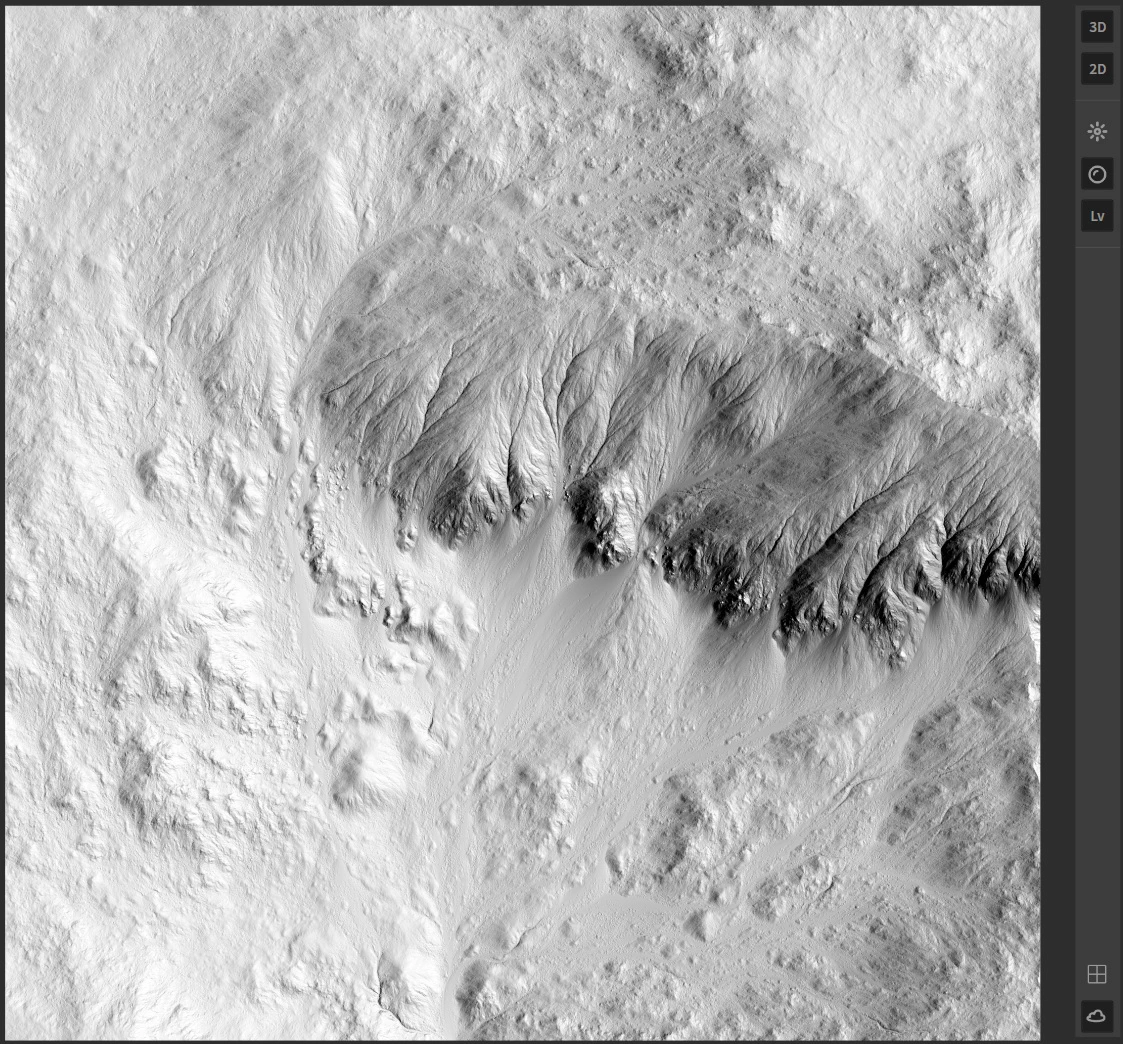
This mode shows a basic heightfield with minimal lighting. 2D maps are shown in grayscale, with black representing lower areas and white representing higher areas. This is a great way to examine your terrain from an unbiased perspective, especially when dealing with 2D data, such as data map outputs, secondary output from erosion, and so on.
You can change the gradient representing the mask color gradient in the viewport settings.
Equalized Mode
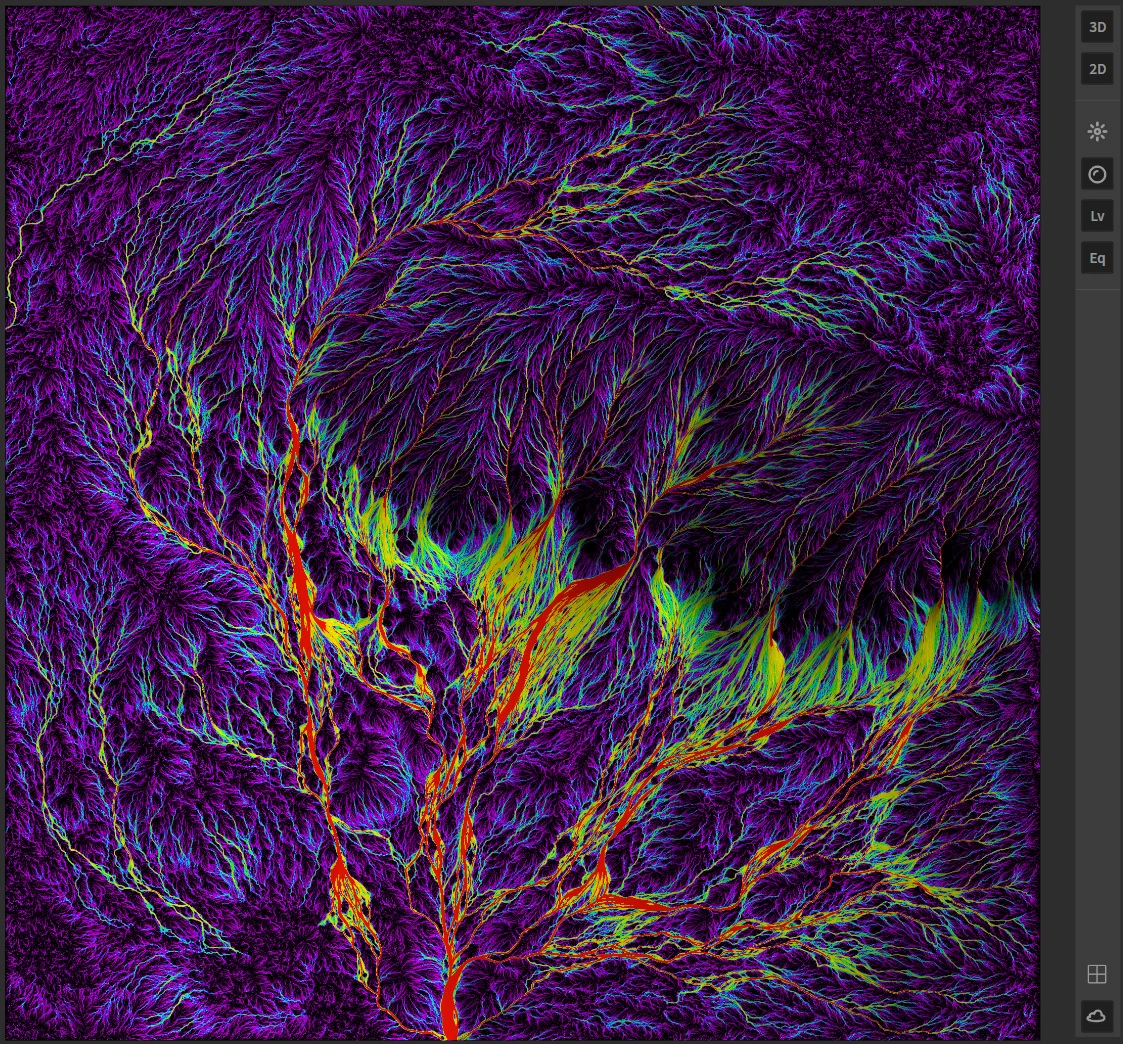
If the 2D view is too difficult to see, the Equalized mode emphasizes the image to help you see better. This is particularly helpful when working with delicate masks and other 2D maps. The equalization process is superficial and does not affect the actual terrain.
The mask color gradient is even more useful in this context.

Official Website | Discord | YouTube | Instagram | LinkedIn
This documentation is licensed under the MIT License, a very permissive open-source license.