Preparing your file for automation
Automation is a great way to use Gaea as a semi-external engine, whether to utilize Gaea's erosion or other nodes in another application, or generate terrain variations.
Professional or Enterprise edition required to take advantage of automation features and bridges to 3rd party applications.
Exposing Properties
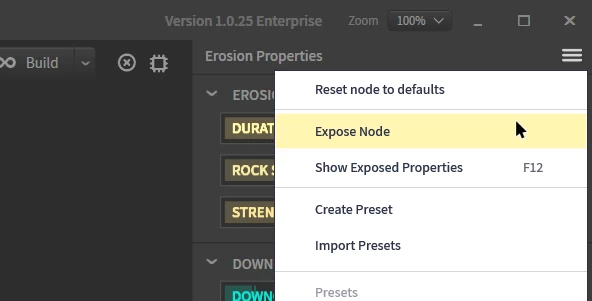
The first step to automation is to expose properties that you wish to modify from the command line. To expose a node's properties, use Node Properties > Expose Properties.

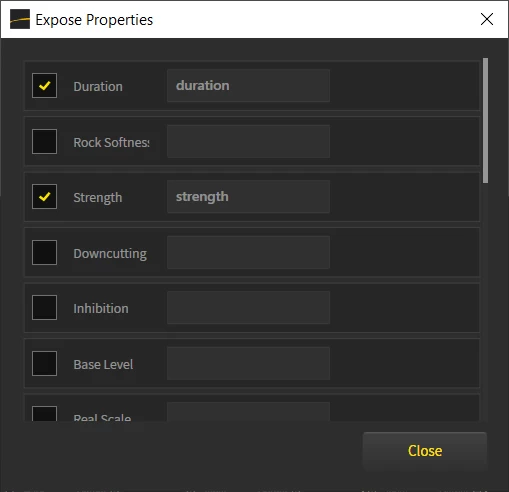
In the dialog that comes up, you can check the properties you want to expose and rename the variable name if needed.
If multiple variables share the same name - even across different nodes - their values will be overwritten. In such a situation, you should rename the variable name to avoid value contamination.

Repeat the process for any other nodes you wish to expose.
You can access all exposed properties from the Node Properties Menu > Show Exposed Properties or press F12.
To process external files and also retrieve the output in an automation scenario, create a File node for each incoming heightmap, and an Output for each heigthmap or color map to be saved. Remember to ensure a unique name for each node's filename variable to avoid crashes or data loss.
Command Line
To modify any variables, use the following command line format: variablename:value. All variables must be appended to the command line after any switches such as --open or --savetor. For additional details on command line usage beyond automation, see Build Swarm.
Here is a full command line example:
"C:\Program Files\QuadSpinner\Gaea\Gaea.Build.exe" "C:\Users\Username\Documents\Gaea\erosion_automata.tor"
 --silent --resolution512
 filein:"Z:\input.webp"
 fileout:"Z:\output.webp"
 duration:0.518
 rocksoftness:0.271
 strength:0.184
 inhibition:1.0
 baselevel:0.0
 realscale:true
 featurescale:2000
 aggressivemode:true
 seed:0

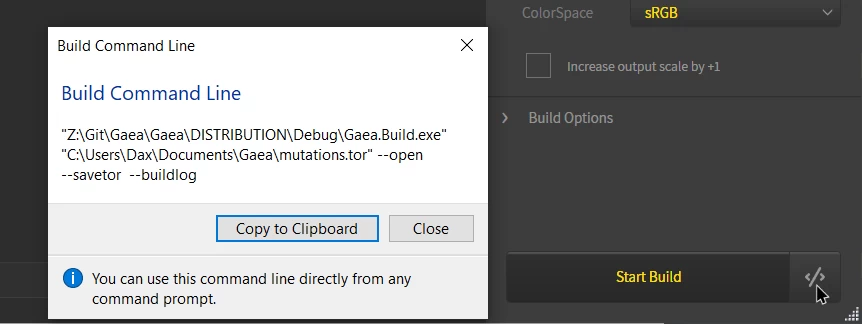
Use the command line review button in the Build Manager to copy the command line based on the settings selected in the Build Manager dialog.
XML Variable Map
Gaea provides the facility to create an XML mapping file containing the details of all the variables exposed, their type, variable name, friendly name, value limits, and default value.
To produce this XML map, pass the --nodemap switch to the Build Swarm.
Gaea.Build.exe "C:\Gaea\erosion_automata.tor" --nodemap
Here is an example of such a node map.
<?xml version="1.0"?>
<Exposed>
    <Parameter Name="File"
               Type="in"
               Variable="fileInput"
               Default="" />

    <Parameter Name="Output"
               Type="out"
               Variable="fileOutput"
               Default="" />

    <Parameter Name="Duration"
               Type="double"
               Variable="duration"
               Min="0.001"
               Max="1"
               Default="0.15" />

    <Parameter Name="Strength"
               Type="double"
               Variable="strength"
               Min="0"
               Max="1"
               Default="0.25" />

    <Parameter Name="Talus Settling"
               Type="double"
               Variable="talussettling"
               Min="0"
               Max="1"
               Default="0.15" />

    <Parameter Name="Fine Detail"
               Type="bool"
               Variable="finedetail"
               Default="True" />

    <Parameter Name="Real Scale"
               Type="bool"
               Variable="realscale"
               Default="True" />

    <Parameter Name="Verticality"
               Type="int"
               Variable="verticality"
               Min="50"
               Max="20000"
               Default="3200" />
</Exposed>
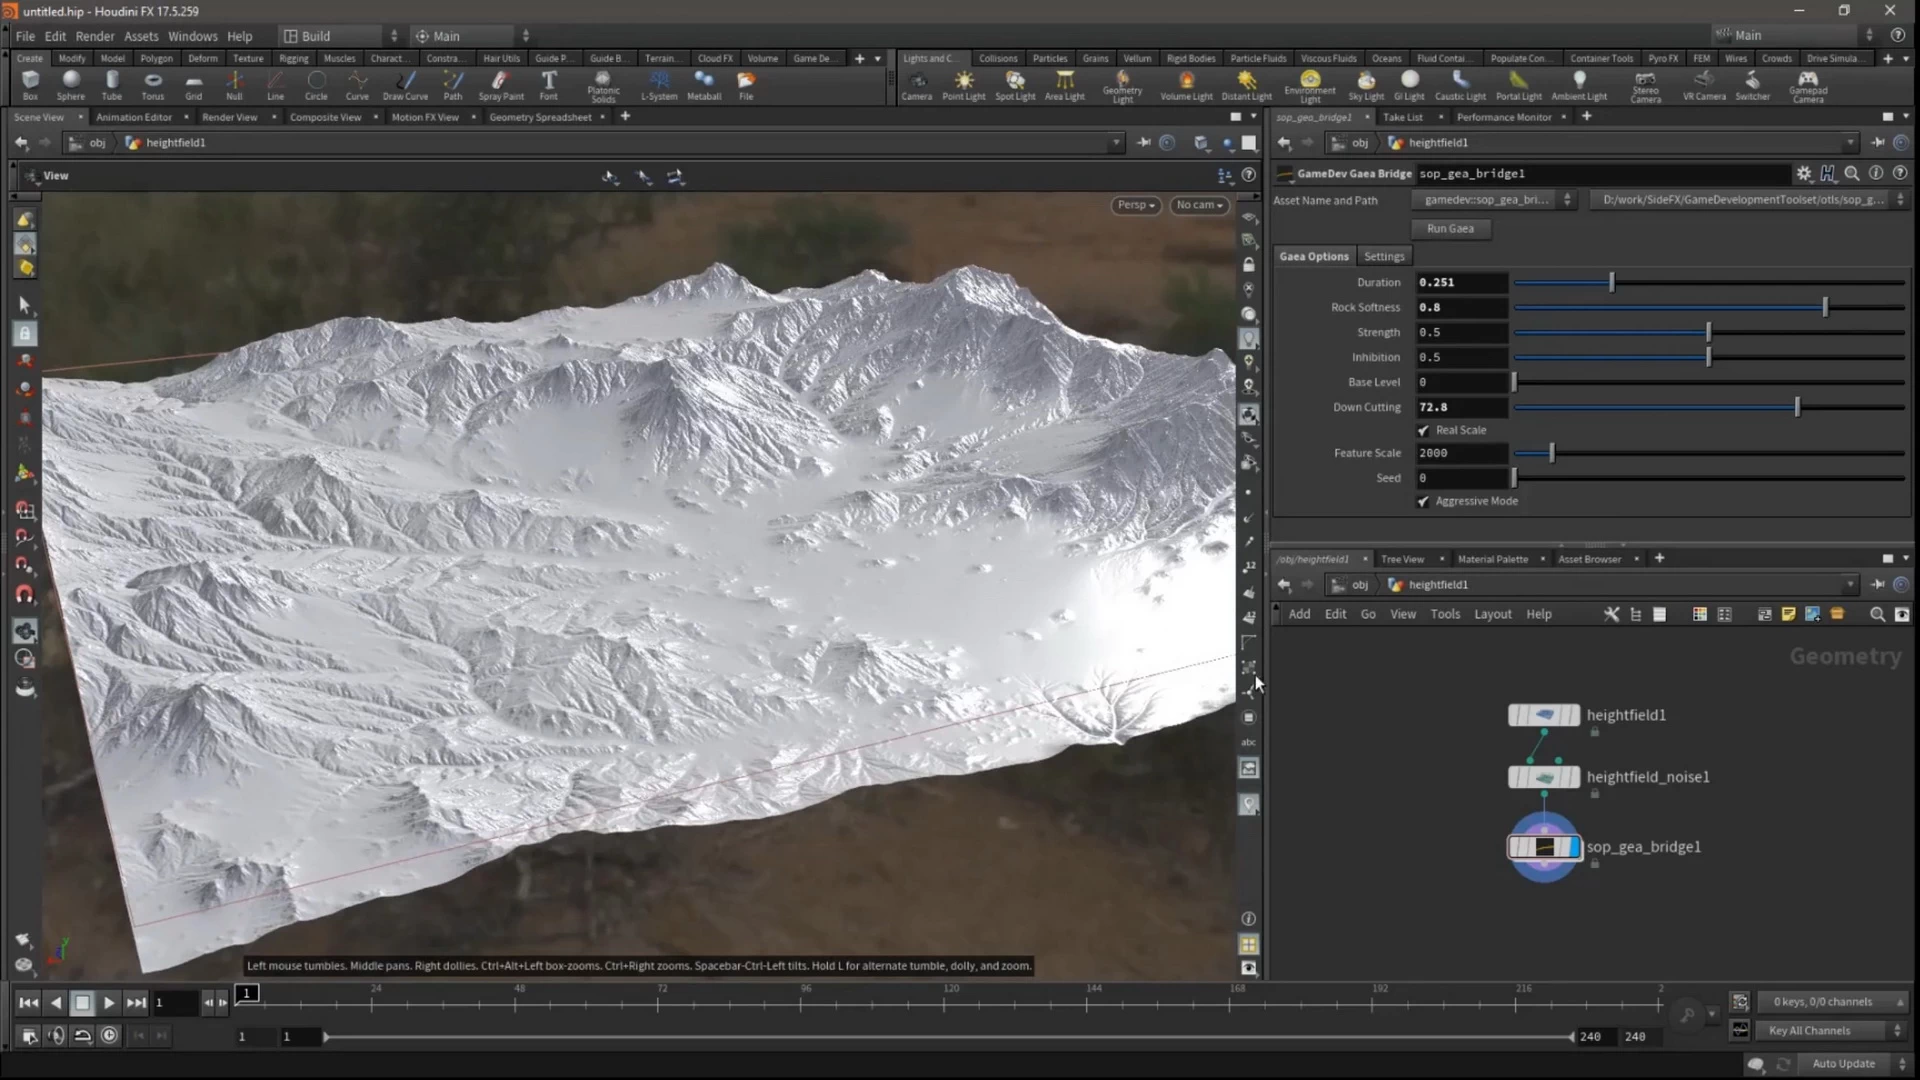
The Houdini bridge uses the node map to construct the UI for the Gaea node.


Official Website | Discord | YouTube | Instagram | LinkedIn
This documentation is licensed under the MIT License, a very permissive open-source license.
